
Polarith AI


1.8
You can find the complete source code on GitHub. The formation behaviours are an extension to the mandatory Polarith AI core of the free/pro version. They allow you to align your agents in a formation where each agent computes its own position inside the formation. In the following sections, we will show you the interrelation between the components, the individual formation types, and what you need to consider to write a custom formation or configurator.
In contrast to the individual behaviours of conventional agents, a formation is a superordinated behaviour. While each agent computes its position on its own and acts autonomously, together, they build a formation. An agent's position is based on the logical position inside the formation, the total amount of agents in the formation, the spacing between agents, formation-specific parameters, and last but not least, the shape. Besides individual formation parameters, the base formation covers the spacing between agents and parameters for movement optimization inside the formation, namely radii as in our Radius Steering Behaviour, and a multiplier:
ArriveRadius. If the agent is between the ArriveRadius and the InnerCatchUpRadius, the magnitude is constantly 1.InnerCatchUpRadius. If the agent is between the Inner and the OuterCatchUpRadius, a value between [0,1] * CatchUpMultiplier is added to the standard magnitude of 1. If the agent is outside the CatchUpRadius, the CatchUpMultiplier is added.InnerCatchUpRadius.The concept of catch up is useful for agents that are on the outer positions of a formation since they need to travel larger distances if the formation rotates. Additionally, agents are able to catch up if they got lost due to avoidance or re-assignment, i.e., the agent has increased interest to keep its position in the formation. To use this feature, a controller that can scale its speed with the magnitude, especially with magnitudes greater than 1, is mandatory. The radii are shown in Figure 1.
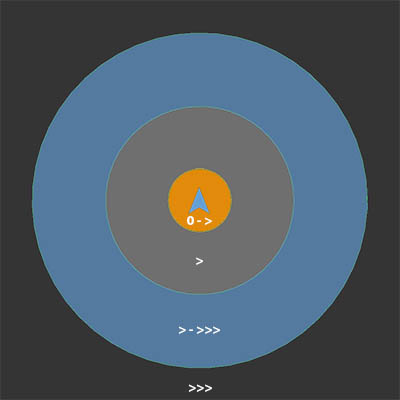
Figure 1: Shows the different radii of all Formation behaviours and their influence on the magnitude. The orange area marks the Arrive Radius, the grey ring marks the Inner Catch Up Radius, the blue ring marks the Outer Catch Up Radius.
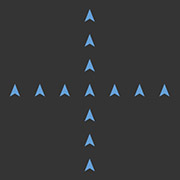
The gizmo to visualize the formation uses the information provided in the front-end class that defines the formation shape. Only a single agent in the formation needs to activate the specific Formation Gizmo. The gizmo draws the boundary of the formation based on the same parameters that are configured in the agent to build the formation. An example gizmo of the [Arrow Formation](Formation Arrow) is shown in Figure 2.
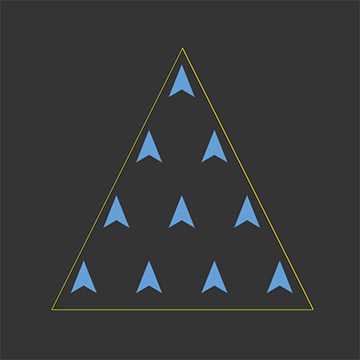
Figure 2: Shows the Formation Gizmo of the Arrow Formation. The extends are based on the properties of the specific formation.
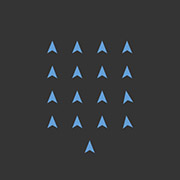
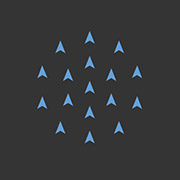
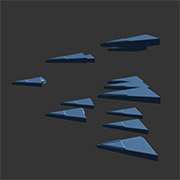
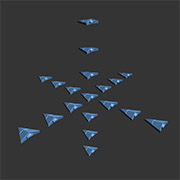
The manual setup of agents to arrange as a formation can be quite elaborately, especially a visually appealing assignment of each agent to the closest position in the formation to reduce movement distances. We provide a component to ease this effort. Formation Configuration automatically gathers agents in child game objects, adjusts the size to the actual number of available agents, and assigns them to the position in the formation, i.e., setting the logical position in the formation. An optimal assignment is known as the Assignment Problem. We provide an AssignmentSolver in the back-end that computes solutions in two different ways. The first is a greedy optimization, that is fast but non-optimal, the second uses the so-called Hungarian Algorithm, which is optimal but slower. You can interpolate between both methods using the parameter AssignComplexity. The difference is shown in Figure 3. Furthermore, you may want to encapsulate the game object with the configuration from the agents. Therefore, you can set the ForeignObtainment to a game object that keeps the formation agents as child objects, i.e., to build a formation of formations. You may re-compute the formation every time a change happens.

Figure 3: The differences between both assignment algorithms. Left: AssignComplexity = 0 (greedy). Right: AssignComplexity = 1 (Hungarian Algorithm).
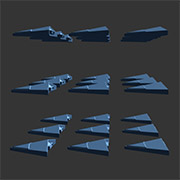
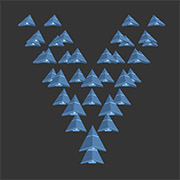
We provide six different types of formations. The following table will show you the formations in 2D, in 3D if available, and their options.
| Arrow | Box | Circle | Cross | Line | V |
|---|---|---|---|---|---|
| 
| 
| 
| 
| |
| 
| - | 
| - | 
|
| non-/solid, non-/planar | non-/solid, non-/planar, agents per line width/height | non-/solid | non-/planar | - | non-/solid, non-/planar, agents per line width/height |
If you want to write your custom formations, you need to inherit from the base classes Formation and AIMFormation. From Formation, you need to implement the ComputePosition() method, that calculates an agent's position inside the formation. The spatial position is based on the logical position inside the formation, the maximum amount of agents, the spacing between agents, as well as the position and rotation of the reference object. It is advisable, to compute the total amount of agents per layer and the total amount of layers first. This way, you can assign an agent to a specific layer and compute its position inside this layer. You can but you don't have to implement mechanics that make use of the formation-specific radii that are mentioned above. From AIMFormation, you must implement the property for Formation and SteeringBehaviour that returns the specific instance of your custom back-end class. Besides these properties, you may want to use this class to draw gizmos, but don't forget to call the base method. We provide an example for you, how to implement a simple line and a cross formation on GitHub. Furthermore, you may want to write your own logic to solve the Assignment Problem. Therefore, you need to write a method, e.g., in AssignmentSolver that processes the available positions in the formation, obtained from ComputePosition() and the spatial position of agents. Your assignment method should return an array of assignments for each agent, i.e., agent i needs to move to position 4. Hereto, you need a customized version of AIMFormationConfiguration to call your assignment method in Assignment(). There are plenty of ways to customize the configuration, e.g., you can change the core logic in Assignment() and UpdateConfig(), or you can override minor methods like GetFormationSize() and AutoObtainAgents() that are called within UpdateConfig().
You define the shape of a formation by its parameters. Even if the layers grow automatically in depth, there might be not enough agents to fill the formation. E.g., imagine a box formation with 4 agents per line in width and a total amount of 14 available agents. Since every row covers 4 agents, 4 rows can cover a maximum of 16 agents. Thus, there are 2 positions left. For cases like this, which are very common, we introduced sparse layers. These sparse layers are always the last (outer) layers of a formation. Agents are placed equidistantly and visually appealing, along with the available space.
Our agents perceive the environment and make a decision in a smart way. Thus, their computational effort is larger than in classic steering. The effort grows linearly with the number of agents (and perceived game objects in the scene). Thus, a large number of agents, as they are common in formations, will heavily affect your performance. Nevertheless, we provide some optimizations that you should use within your scenes.
SpatialPartition in the Steering Perceiver to separate the scene into subspaces.Range of the Steering Filter so that agents only perceive what is nearby.UpdateFrequency in the Context to reduce the number of computations. A value of 10 will mostly be enough.LoadBalanced to split the AI updates across multiple update calls of Unity. Alternatively, you can use the Synchronous or Asynchronous threading but make sure that your target platform supports enough CPU cores and Threaded is enabled in AIMContext.